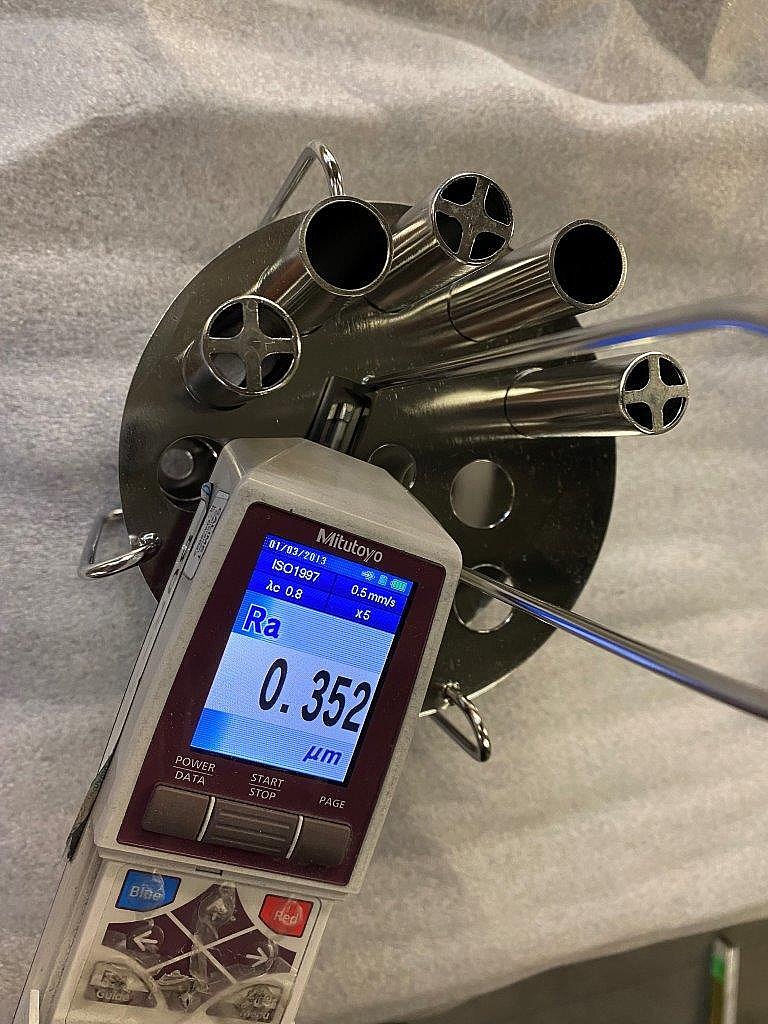
Surface roughness values
In stainless steel finishing, roughness values, such as Ra values, play a crucial role. For applications where surfaces need to be easily cleanable, ensure good product flow, or prevent bacteria and contaminants from settling, a low roughness value is essential. A lower roughness value also reduces the risk of corrosion formation.

What are surface roughness values?
- Ra value: The average deviation of the surface from a reference line over a standardized measurement length. This is the most commonly used parameter for roughness.
- Other parameters: Rz (average peak height) and Ry (maximum peak height) are also common roughness parameters.
- Unit: Roughness values are expressed in micrometers (µm).
Commonly used Ra values:
-
Ra < 3.2 µm: Very rough finish.
-
Ra < 1.2 µm: Relatively easy achievable finish.
-
Ra < 0.8 µm: Fine finish; often the most used limit for a maximum Ra value.
-
Ra < 0.5 µm: Very fine finish, with values down to Ra 0.1 µm or even 0.05 µm as the lowest that Alinco can achieve.

Applications and Advantages
- Hygiene: Lower roughness values are essential for applications in the food and pharmaceutical industries where hygiene is crucial.
- Corrosion resistance: A smoother surface reduces the risk of corrosion formation.
- Cleanability: Lower roughness values make it easier to keep surfaces clean and maintain them.
Cost implications
Achieving a low Ra value has cost consequences. The lower the required roughness value, the more processing and costs are needed to achieve it.
Roughness is measured using a calibrated roughness meter, where a stylus moves over the surface.
Specification on Drawings
Given the cost implications, it is important to carefully consider the roughness requirements. Please make sure to correctly specify these on the drawings.
How to reduce?
Techniques to reduce roughness include:
Mechanical polishing
Electropolishing (limited)
A note on Ra values
The Ra value will remain a benchmark for years to come.
This is not entirely 100% accurate because the microscopic topography of the surface also plays a role in cleanability and dirt adhesion resistance.
It is clear that sharp peaks and valleys at Ra 0.8 µm can be less hygienic than soft microscopic undulations at Ra 1.2 µm. Such undulating surfaces are often achieved by forms of wet blasting such as Sublimotion.
Conducting Roughness Measurement
Roughness measurements are performed according to a calibrated method. Each measurement starts with a calibration check of the device. Then several measurements are taken on the surface to determine a reliable average Ra value. Afterwards, calibration is repeated as an extra check.
Customers receive a clear Ra measurement report, like the standard example below. This report contains all relevant data, including measurement results, calibration mentions, and a visual indication of measurement locations.
Example Ra Report:
In the files below you can find the device analysis report and the drawing report in question.
